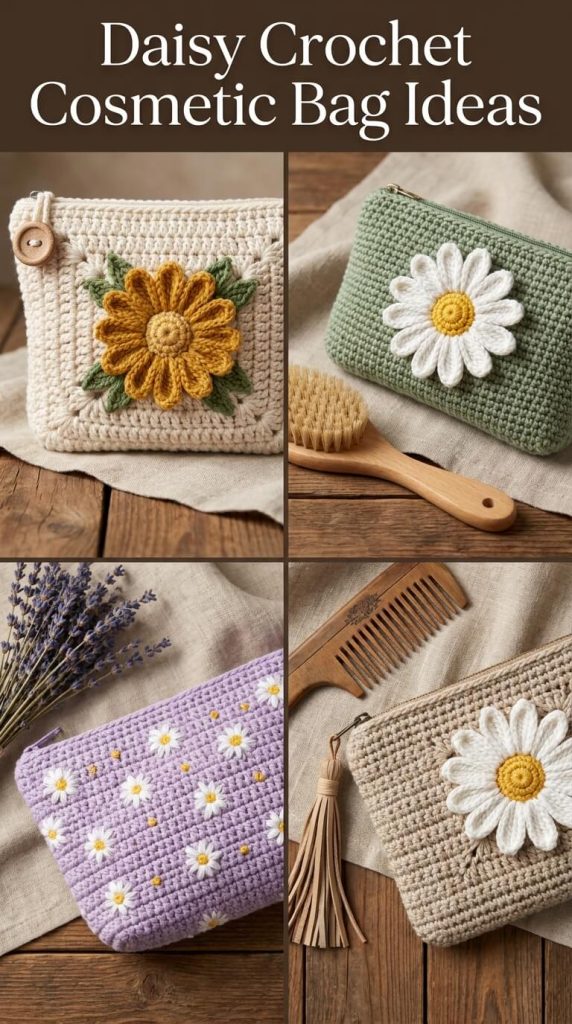
Crochet cosmetic bags featuring daisy motifs have become a favorite among makers for good reason. They combine practicality with cheerful, handmade charm. The designs shown in popular inspirations typically fall into four main styles: a cream pouch with a large yellow daisy and green leaves finished with a wooden button, a soft sage-green zippered bag with a single oversized white daisy, a lilac pouch scattered with multiple small embroidered or appliquéd daisies, and a neutral beige bag with a prominent white daisy and a tassel detail.
This guide provides accurate, detailed instructions and techniques so you can recreate these looks (or create your own variations) with professional results. Everything is written for intermediate beginners and up, using standard US crochet terms.
Why These Bags Work So Well
Cosmetic bags need structure, a secure closure, and a surface that shows off decorative elements without becoming bulky. Cotton or cotton-blend yarn is ideal because it holds shape, washes well, and creates a clean fabric-like texture. The daisy motifs are usually worked separately as appliqués (or embroidered) and sewn on after the bag is complete. This keeps the pouch itself sturdy while allowing the flowers to stand out in high relief.
Materials You Will Need
- Yarn: Worsted-weight (category 4) 100% cotton or cotton blend. Popular choices include Lion Brand 24/7 Cotton, Dishie, or similar. You’ll need approximately 100–150 yards of the main bag color and smaller amounts of white, yellow, and green for the daisies and leaves.
- Hook: 4.0 mm to 5.0 mm, depending on the yarn and desired density. A tighter gauge produces a firmer bag that holds its shape better.
- Notions: Yarn needle, scissors, stitch markers, zipper (7–9 inches for most sizes), optional magnetic snap or wooden button, lining fabric (optional but recommended for a polished finish), sewing needle and thread for the zipper and lining.
- Optional extras: Tassel maker or yarn for a tassel, wooden beads, or a small wooden button.
Finished size for a typical cosmetic bag is roughly 7–9 inches wide by 5–6 inches tall when closed, but you can easily adjust by changing the starting chain or number of rows.
Basic Bag Construction (Works for All Four Styles)
Most of these pouches are made as a simple rectangle that is folded and seamed, or worked in the round as a flat-bottomed pouch.
Option 1 – Flat Rectangle Method (easiest for beginners)
- Chain the desired width (for example, chain 35–40 for a medium bag).
- Work single crochet (sc) or half double crochet (hdc) rows until the piece measures twice the desired height of the finished bag plus a small allowance for the fold.
- Fold the rectangle in half with the right sides together. Seam the two short sides with a whip stitch or slip stitch. Turn right side out.
- Attach a zipper along the open top edge by sewing it by hand or machine. For a cleaner finish, add a fabric lining before installing the zipper.
Option 2 – Worked in the Round (creates a more structured base)
- Create an oval or rectangular base by working sc or hdc in the round, increasing at the corners.
- Once the base reaches the desired size, stop increasing and work even rounds until the bag reaches the preferred height.
- Finish the top edge with a round of sc or hdc for a neat edge before adding the zipper.
A lining is highly recommended. Cut fabric slightly smaller than the finished crochet piece, sew the sides, and insert it so the zipper is sandwiched between the crochet and the lining. This prevents makeup from catching on the stitches and gives the bag a professional interior.
Creating the Daisy Motifs
The flowers are the star of these designs. You can crochet them as separate appliqués or embroider them directly onto the bag.
Classic Crocheted Daisy (for the large single flowers)
Center (yellow):
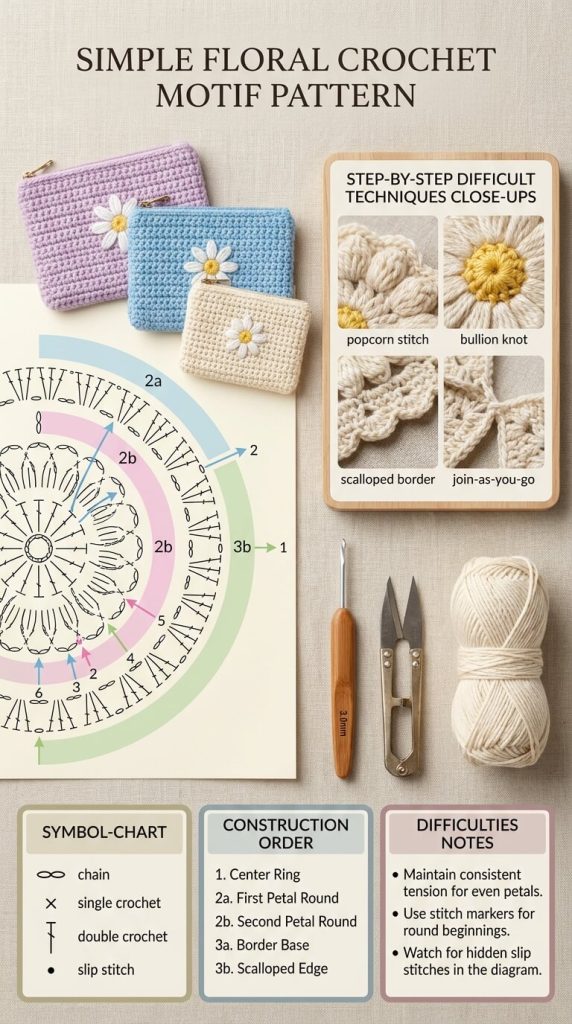
- Magic ring, ch 2 (does not count as a stitch), 12 dc into the ring. Join with slip stitch. Fasten off.
Petals (white):
- Join white yarn in any stitch.
- Ch 3 (or 4 for taller petals), 3–4 dc or tr in the same stitch, slip stitch into the next stitch. Repeat around for 12 petals.
- Fasten off and weave in ends.
For a fuller, more dimensional look, work the petals in the spaces between the center stitches rather than into the stitches themselves.
Small Scattered Daisies (for the lilac multi-flower style)
Make tiny versions: magic ring with 6–8 sc for the center, then 5–6 short petals of (ch 2, 2 hdc, slip stitch). Sew them randomly across the surface, spacing them evenly but not in a rigid pattern.
Leaves (green)
Simple leaf: Ch 8–10. Work sc, hdc, dc, hdc, sc down one side of the chain, then mirror the same stitches on the other side. Pinch the base slightly when sewing to create a natural leaf shape. Position two or three leaves under the large daisy for the cream-style bag.
Assembling the Designs from the Inspiration Image
- Cream Bag with Large Yellow Daisy and Button
Work the bag in a textured stitch such as the bobble or granite stitch for visual interest. Crochet a large yellow-centered daisy with green leaves. Sew the motif slightly off-center on the front. Finish the top with a short flap or simply attach a wooden button and a small loop of chain stitches for closure. - Sage Green Zippered Pouch with Single White Daisy
Use a smooth sc or hdc fabric for a clean modern look. Crochet one large white daisy with a bright yellow center and sew it prominently on the front. Install a metal or plastic zipper in a matching or contrasting color. This design looks especially elegant when the daisy sits slightly toward one corner. - Lilac Bag with Multiple Small Daisies
Crochet the pouch in a soft lilac shade. Make 8–12 tiny white daisies with yellow centers. Arrange them in a scattered, organic pattern across the front (and optionally the back). Sew them on securely with matching yarn, catching only the back of the stitches so the attachment is invisible from the front. - Beige Bag with Large Daisy and Tassel
Work the bag in a neutral beige or oatmeal yarn. Attach a large white daisy with yellow center. Add a simple tassel to the zipper pull by wrapping yarn around a piece of cardboard, tying the top, and attaching it with a short chain or jump ring. This finishing detail elevates the entire piece.
Finishing and Professional Touches
- Always block the finished bag lightly if needed so the edges lie flat.
- Weave in every end carefully; loose tails can catch on makeup tools.
- If using a zipper, baste it in place first and check that the bag opens and closes smoothly before final stitching.
- For extra structure, you can insert a thin piece of plastic canvas or interfacing between the crochet and the lining.
- Wash-test a small swatch of your yarn and motifs before making the full bag so you know how the colors and stitches will behave.
Customization Ideas
Change the main color to match a favorite outfit or season. Use variegated yarn for the bag body while keeping the daisies solid. Add a short wrist strap or a longer shoulder strap. Embroider the owner’s initials next to the daisy for a personalized gift. Switch the large daisy for a sunflower by making longer petals and a fuller center.
These daisy crochet cosmetic bags are quick enough for a weekend project yet special enough to give as gifts or sell at craft markets. By building a solid basic pouch and then adding carefully made flower motifs, you create pieces that look intentional and polished rather than hastily decorated.
Follow the techniques above, take your time with the appliqué placement, and you will produce bags that match (or improve upon) the charming examples that inspire so many makers. Happy crocheting!